What is Sap and Why it Needs to be Removed
sap remover, resinous substance produced by trees and plants as a natural defense mechanism against injury or disease. It can come from various sources, including overhanging tree branches, bird droppings containing sap residue, and even insects carrying sap from nearby trees. When sap gets onto the surface of your car, it can quickly harden and become a stubborn stain that is difficult to remove.
Removing sap stains from your car is essential for several reasons. First and foremost, sap can be incredibly damaging to your car’s paint job. The acidic nature of sap can etch into the clear coat and paint, causing permanent discoloration, etching, and even paint peeling if left untreated for an extended period. Additionally, sap stains can be unsightly and detract from the overall appearance of your vehicle, reducing its resale value.
Identifying Sap Stains on Your Car
Sap stains can be tricky to identify, especially when they’re fresh. Fresh sap stains often appear as clear or slightly yellowish droplets on the surface of your car. These droplets may look like water droplets at first glance, but they’ll feel sticky to the touch. As the sap dries, it becomes more noticeable, forming a hard, amber-colored or brownish residue that can be difficult to remove.
Sap stains are most commonly found on the areas of your car that are directly exposed to trees, such as the windshield, hood, roof, and side mirrors. The windshield is particularly susceptible to sap stains, as trees overhanging the road can drip sap onto your car as you drive. The hood and roof are also prime targets, especially if you park under or near trees. Side mirrors can also accumulate sap stains from overhanging branches or nearby vegetation.
It’s essential to identify and remove sap stains promptly, as they can become increasingly difficult to remove the longer they’re left on your car’s surface. Fresh sap stains are generally easier to remove than dried, hardened sap residue, which can etch into the clear coat or paint if left unattended for too long.
Preparing for Sap Removal
Before you begin the process of removing sap from your car, it’s essential to gather the necessary materials and take the proper precautions. Having the right tools and setting up a suitable environment will make the task more efficient and effective.
Necessary Materials:
- Microfiber cloths: These soft, lint-free cloths are gentle on your car’s paint and won’t scratch the surface.
- Sap remover: Choose a high-quality sap remover specifically designed for automotive use. Look for products that are safe for clear coats and won’t damage the paint.
- Car wash supplies: Have a bucket, car shampoo, and a wash mitt on hand to clean the area before and after sap removal.
- Protective gear: Wear gloves to protect your hands from harsh chemicals and safety glasses to prevent any accidental splashes in your eyes.
Precautions:
- Avoid direct sunlight: Work in a shaded area or a garage to prevent the sap remover
- from drying too quickly and potentially damaging the paint.
- Work in sections: Divide the affected area into smaller sections and tackle them one at a time. This will ensure that you don’t miss any spots and can work methodically.
- Test first: Before applying the sap remover to a large area, test it on a small, inconspicuous spot to ensure it doesn’t cause any adverse reactions or discoloration.
Safety Considerations:
- Read labels carefully: Follow the manufacturer’s instructions for proper usage and safety precautions.
- Ventilate the area: Many sap removers contain strong chemicals, so ensure the workspace is well-ventilated to avoid inhaling fumes.
- Protect surrounding areas: Use masking tape or plastic sheeting to cover any areas you don’t want the sap remover to come into contact with, such as trim, rubber seals, or glass.
By taking the time to prepare properly, you’ll ensure a smooth and effective sap removal process while minimizing the risk of damage to your car’s finish.
Step-by-Step Guide to Removing Sap
Removing sap from your car’s surface requires a systematic approach, as the process may vary depending on whether the sap is fresh or dried. Here’s a detailed step-by-step guide to help you tackle sap stains effectively:
-
Act quickly: The sooner you address fresh sap stains, the easier they will be to remove. Avoid letting the sap dry and harden on the surface.
-
Protect your hands: Wear gloves to prevent the sticky sap from getting on your skin.
-
Gently scrape: Use a plastic scraper or dull knife to carefully lift off as much of the fresh sap as possible, being careful not to scratch the paint.
-
Apply a sap remover: Choose a dedicated sap remover product designed for automotive use. Follow the manufacturer’s instructions for application and dwell time.
-
Agitate and rinse: Use a soft-bristle brush or microfiber cloth to gently agitate the area, then rinse thoroughly with clean water.
-
Soften the sap: Apply a sap remover or a mixture of warm water and dish soap to the dried sap stain. Let it soak for several minutes to help soften the hardened sap.
-
Gently scrub: Use a soft-bristle brush or microfiber cloth to gently scrub the area in a circular motion, applying moderate pressure.
-
Rinse and repeat: Rinse the area with clean water, and repeat the soaking and scrubbing process if necessary until the sap is fully removed.
-
Use a clay bar: If the sap stain persists, try using a clay bar designed for automotive detailing. Knead the clay and gently rub it over the affected area to lift the sap residue.
-
Apply rubbing compound: For extremely stubborn stains, you may need to use a rubbing compound or polish designed for removing surface contaminants. Follow the product instructions carefully and work in small sections.
-
Seek professional help: If you’ve tried multiple methods without success, consider seeking the assistance of a professional detailer or auto body shop for safe and effective sap removal.
Remember, always follow the product instructions carefully and work in a well-ventilated area. Patience and persistence are key when dealing with stubborn sap stains.
Commercial Sap Remover Products
Commercial sap removers are specially formulated products designed to effectively dissolve and remove stubborn sap stains from your car’s exterior. These products come in various forms, including sprays, gels, and liquids, and are typically made from a combination of solvents, surfactants, and other ingredients that help break down the sticky sap residue.
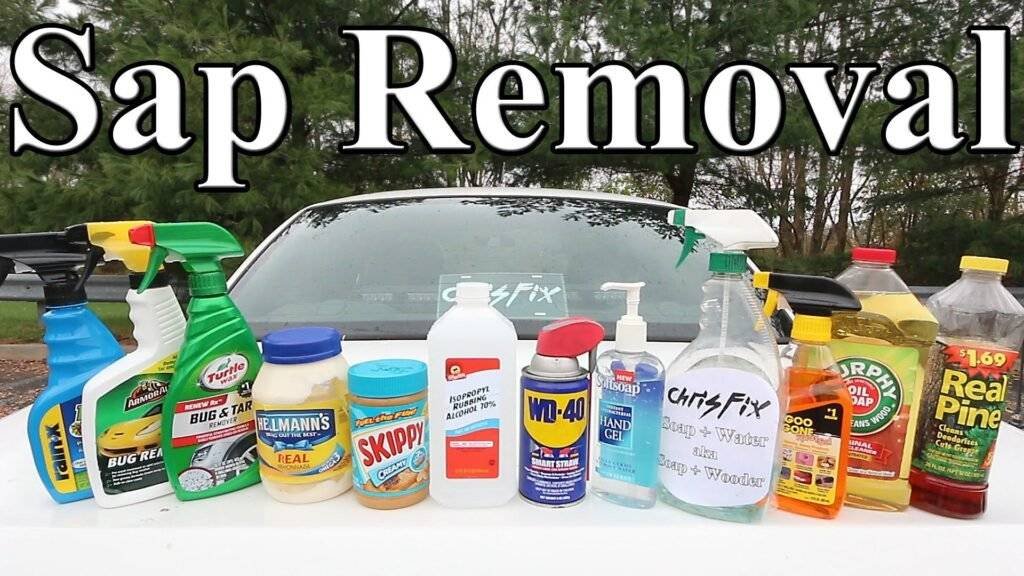
One of the most popular commercial sap removers is the Turtle Wax Renew Rx Sap Remover. This spray-on formula is designed to quickly dissolve sap and make it easier to wipe away without damaging your car’s paint or clear coat. It’s effective on both fresh and dried sap stains and can be used on various surfaces, including glass, chrome, and plastic.
Another widely used product is the Meguiar’s Sap Remover. This gel-based formula clings to vertical surfaces, allowing it to work on sap stains without dripping or running. It’s particularly useful for removing sap from hard-to-reach areas, such as around trim and emblems.
Pros of commercial sap removers:
- Highly effective at dissolving and removing sap stains
- Designed specifically for automotive use, ensuring paint and clear coat safety
- Convenient and easy to use
- Suitable for various surfaces, including paint, glass, and chrome
Cons of commercial sap removers:
- Can be more expensive than home remedies
- Some products may have strong chemical odors
- Improper use or overexposure may potentially damage certain surfaces
Application methods for commercial sap removers typically involve spraying or applying the product directly onto the sap stain, allowing it to dwell for a few minutes, and then wiping or rinsing it away. It’s essential to follow the manufacturer’s instructions carefully to ensure optimal results and avoid any potential damage.
Overall, commercial sap removers are highly effective and convenient solutions for tackling sap stains on your car. However, it’s always a good idea to test the product on a small, inconspicuous area first to ensure compatibility with your car’s surfaces.
Home Remedies for Sap Removal
If you prefer a more natural and cost-effective approach, several household items can effectively remove sap stains from your car’s exterior. These DIY solutions are readily available and environmentally friendly, making them a popular choice for many car owners.
Vinegar
White vinegar is a versatile cleaning agent that can tackle sap stains with ease. Its acidic nature helps break down the sticky residue, making it easier to wipe away. Here’s how to use vinegar for sap removal:
- Mix equal parts of white vinegar and water in a spray bottle.
- Spray the solution directly onto the sap stain.
- Allow it to sit for a few minutes to penetrate the sap.
- Use a microfiber cloth or a soft-bristled brush to gently scrub the area.
- Rinse with clean water and dry with a clean cloth.
Vinegar is inexpensive, readily available, and safe for most car finishes. However, it may have a strong odor, and you’ll need to ensure that you rinse it thoroughly to prevent any potential damage to the paint.
Baking Soda
Baking soda is a mild abrasive that can help remove stubborn sap stains without scratching the paint. Here’s how to use it:
- Make a paste by mixing baking soda and water.
- Apply the paste directly onto the sap stain.
- Let it sit for a few minutes to allow the baking soda to work its magic.
- Use a microfiber cloth or a soft-bristled brush to gently scrub the area.
- Rinse with clean water and dry with a clean cloth.
Baking soda is a gentle and eco-friendly option, but it may require more elbow grease for tougher stains.
WD-40
While not a traditional cleaning solution, WD-40 can be an effective sap remover. Its lubricating properties help break down the sticky residue, making it easier to wipe away. Here’s how to use it:
- Spray WD-40 directly onto the sap stain.
- Let it sit for a few minutes to penetrate the sap.
- Use a microfiber cloth or a soft-bristled brush to gently scrub the area.
- Rinse with clean water and dry with a clean cloth.
WD-40 is readily available and can be a powerful sap remover, but it’s essential to use it cautiously and rinse thoroughly to prevent any potential damage to the paint or trim.
These home remedies are cost-effective and readily available, making them an attractive option for many car owners. However, it’s essential to exercise caution and follow the instructions carefully to avoid any potential damage to your car’s finish.
Preventing Future Sap Stains
Preventing sap stains from occurring in the first place is always easier than dealing with the removal process. Here are some effective strategies to help you avoid future sap stains on your car:
Park Away from Trees
One of the most obvious preventive measures is to park your car away from trees, especially those known for producing excessive sap, such as pine, oak, and maple trees. If possible, choose a parking spot in an open area or a covered garage to minimize the risk of sap dripping onto your vehicle.
Use Car Covers or Sealants
Investing in a high-quality car cover can provide an additional layer of protection against sap and other environmental contaminants. Look for covers specifically designed to resist sap and bird droppings. Alternatively, you can apply a sealant or wax to your car’s paint, which can make it easier to remove sap if it does land on the surface.
Benefits of Preventive Measures
Taking preventive measures against sap stains not only saves you time and effort in the long run but also helps maintain the appearance and value of your car. Sap can be challenging to remove, and prolonged exposure can lead to permanent damage to the paint and clear coat. By being proactive, you can minimize the risk of unsightly stains and costly repairs.
Professional Sap Removal Services
They also have the expertise to handle delicate areas, such as tinted windows or convertible tops, with care.
The cost of professional sap removal services can vary depending on the extent of the stains, the size of your vehicle, and the location. However, it’s generally a worthwhile investment, especially if you value your car’s appearance and want to protect its resale value. Professional detailing can save you time, effort, and frustration, and ensure that the job is done correctly the first time.
When choosing a professional detailing service, it’s essential to do your research and find a reputable provider. Look for companies with positive reviews, experienced technicians, and a track record of delivering high-quality work.
Troubleshooting Stubborn Sap Stains
Despite your best efforts, some sap stains can be incredibly stubborn and resist removal. If you’ve tried various methods and the sap remains stubbornly adhered to your car’s surface, don’t despair. There are additional techniques and alternative methods you can try to tackle those persistent stains.
One option is to use a clay bar, a specialized detailing tool designed to remove bonded contaminants from the clear coat. Clay bars can effectively lift and remove stubborn sap residue that other methods may have missed. However, clay bars require some skill and care to use properly, as improper technique can potentially mar the paint.
Another approach is to try using a polishing compound or paint cleaner. These abrasive products are formulated to remove light scratches, oxidation, and bonded contaminants from the paint surface. When used with a dual-action or rotary polisher, they can sometimes dislodge and remove even the most tenacious sap stains. However, it’s crucial to follow the manufacturer’s instructions carefully and work in small sections to avoid damaging the paint.
If you’ve exhausted all DIY methods and the sap stains remain, it may be time to seek professional assistance. Detailing specialists and auto body shops have access to industrial-strength sap removers and specialized tools that can tackle even the most stubborn stains. They also have the expertise to safely and effectively remove sap without damaging your car’s paint or clear coat.
Car Care After Sap Removal
After successfully removing sap from your car’s surface, it’s crucial to follow proper car care practices to maintain the vehicle’s pristine appearance and protect the paint from future damage. Neglecting post-sap removal care can lead to premature fading, oxidation, and deterioration of the clear coat and paint.
One of the most important steps is to thoroughly wash your car using a high-quality car shampoo and a soft microfiber mitt or sponge. This process will remove any residual sap remover or debris that may have been left behind during the removal process. Ensure that you rinse thoroughly to prevent water spots from forming.
Look for carnauba-based waxes or synthetic sealants that offer long-lasting protection.
Regular maintenance is key to keeping your car’s finish in top condition. Aim to wash and wax your vehicle every few months, or more frequently if it’s exposed to harsh conditions. Additionally, consider using a paint protection film or ceramic coating for added defense against sap, scratches, and other potential damage.